Primary mirror dew heater
I'm trying to approach a point with my equipment where I can turn it on, point at an object, and review the data the next day. One of the last pieces of the puzzle is handling dew buildup on the newtonian's mirrors. The commerical products are quite expensive, and it seemed like an opportunity to goof with the Arduino. Below is a sequence of pictures showing the build start to finish.
If you decide to build this, keep in mind you are dealing with electricity and materials that can get very hot very quickly. Take all safety precautions, check your measurements twice, do static testing before using it on your equipment. Keep in mind this is a build from a hobbyest - as far as you know I'm just some quack on the internet, I'm only responsible for destroying my own toys, not yours.
If you decide to build this, keep in mind you are dealing with electricity and materials that can get very hot very quickly. Take all safety precautions, check your measurements twice, do static testing before using it on your equipment. Keep in mind this is a build from a hobbyest - as far as you know I'm just some quack on the internet, I'm only responsible for destroying my own toys, not yours.
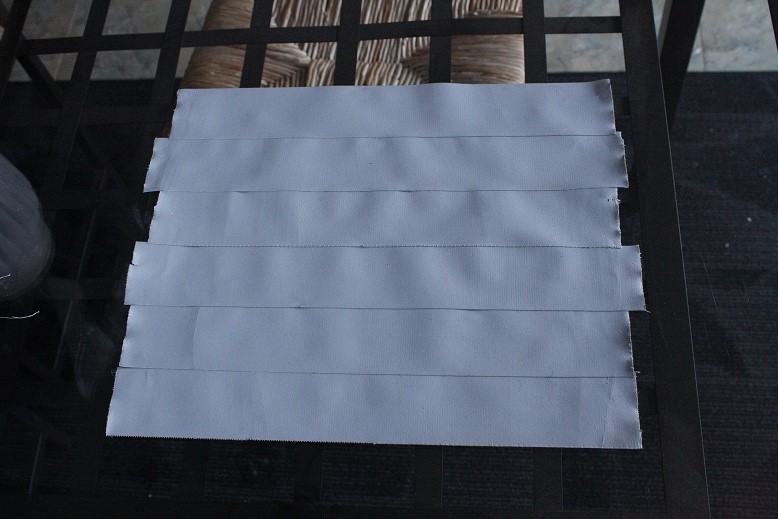
Step 1: Make a sheet of duct tape.
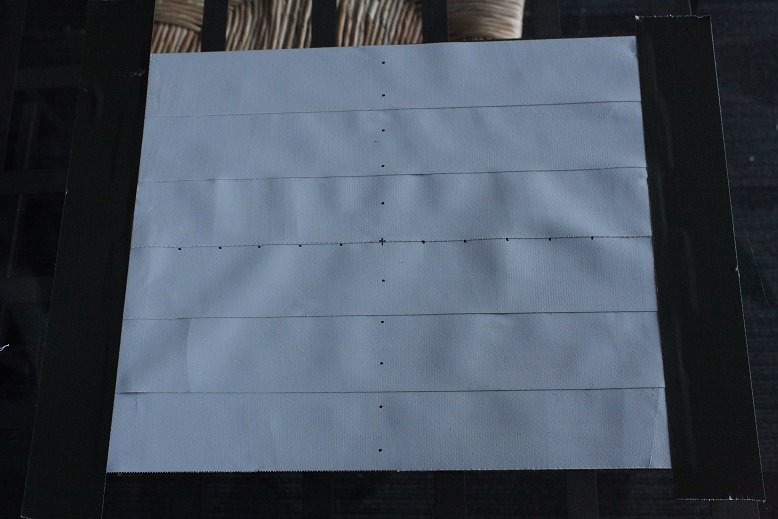
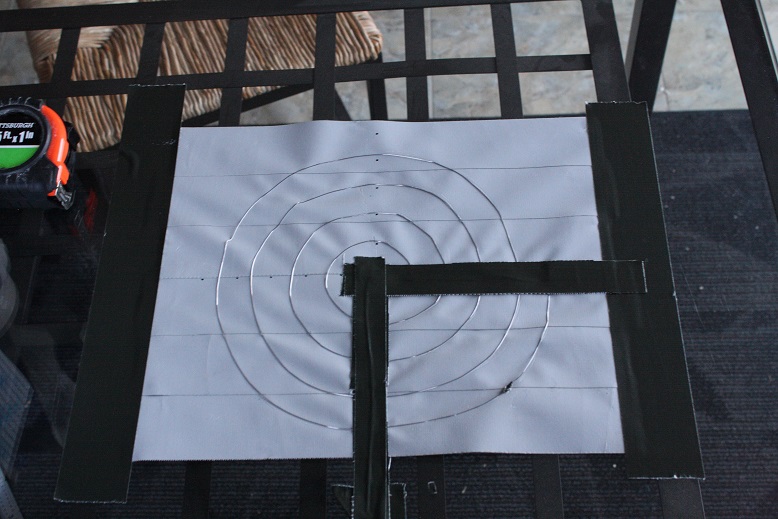
Step 2: Establish grid points - this will help when spiraling the nichrome wire
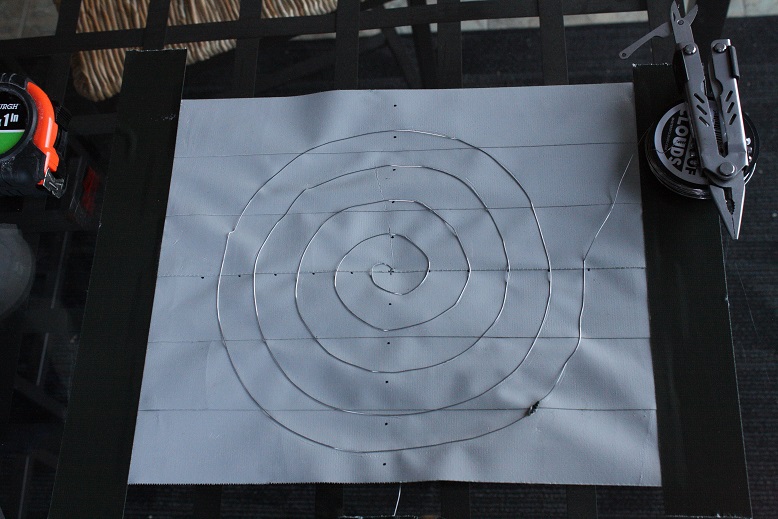
Step 3: Spiral the nichrome wire.
I used 24 gauge from Amazon. I used this calculator to estimate the length I would
need to have 200 degrees F with 19V (check the final resistance later to confirm everything.
Run a length underneath, poke through the center, then spiral outward trying to maintain a
constant pitch.
Note: (I did not do this initially, ended up accidentally shorting the wire) Add a few (3-4)
layers of duct tape at every intersection point. My first bench test the nichrome melted
through and shorted out, making the wire very hot incredibly quickly.
Step 4: Create a duct tape bridge to double back to your starting point.
Again, use extra thickness in way of the intersections
Again, use extra thickness in way of the intersections
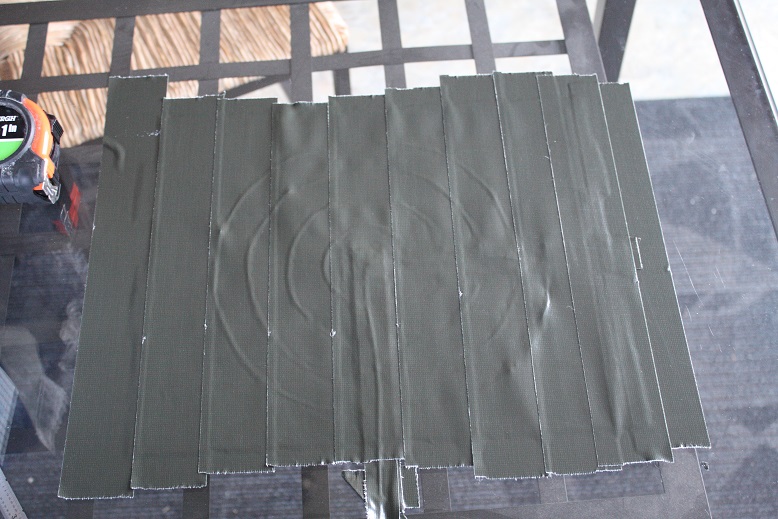
Step 5: Finish the duct tape sheet
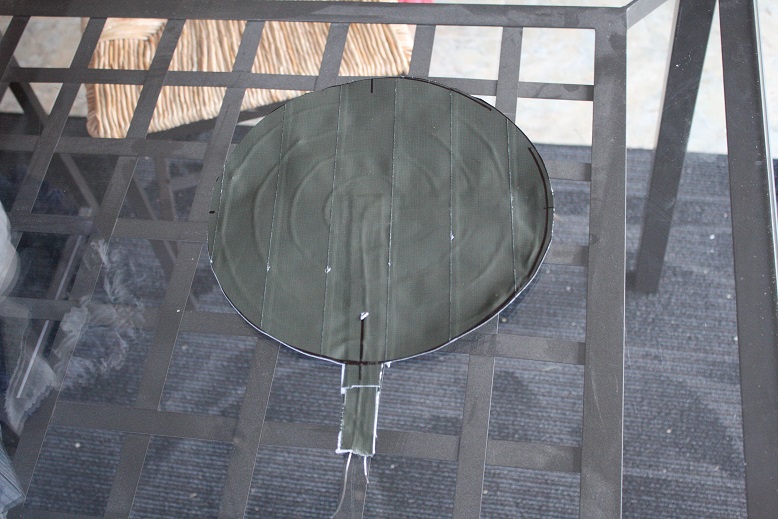
Step 6: Cut the sheet to size. I used a 10" pot to outline the right shape, then cut it out with a razor
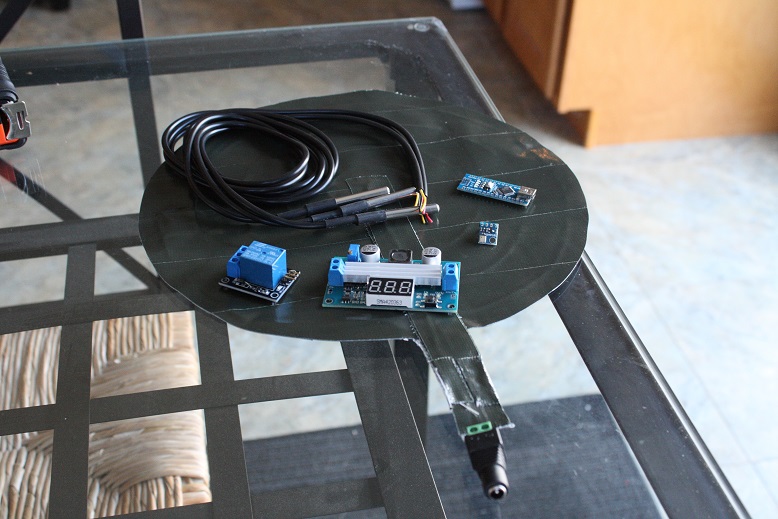
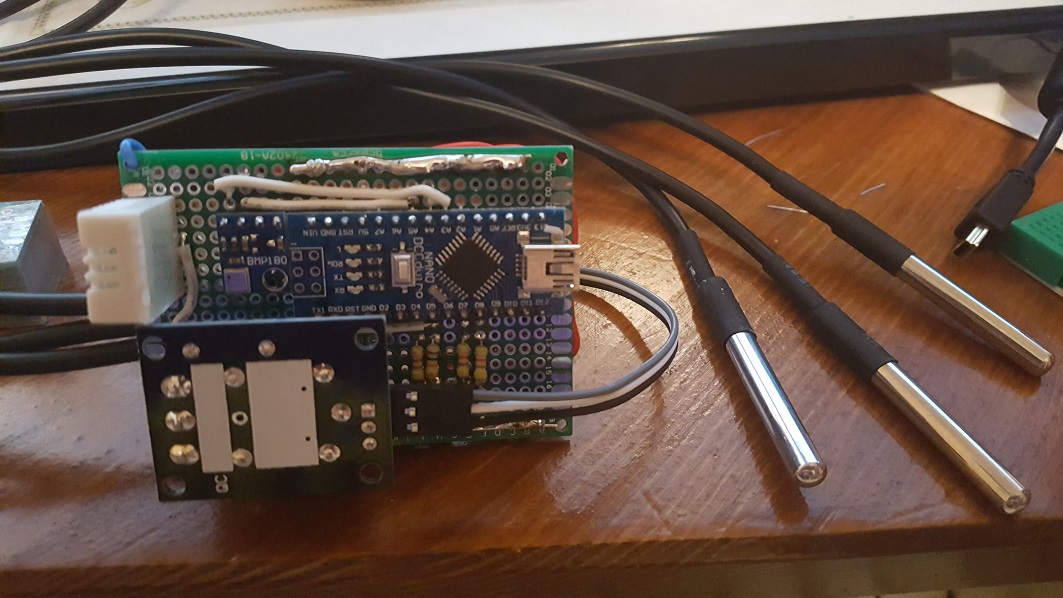
Step 7: Assemble your electronics, the heating pad is done!
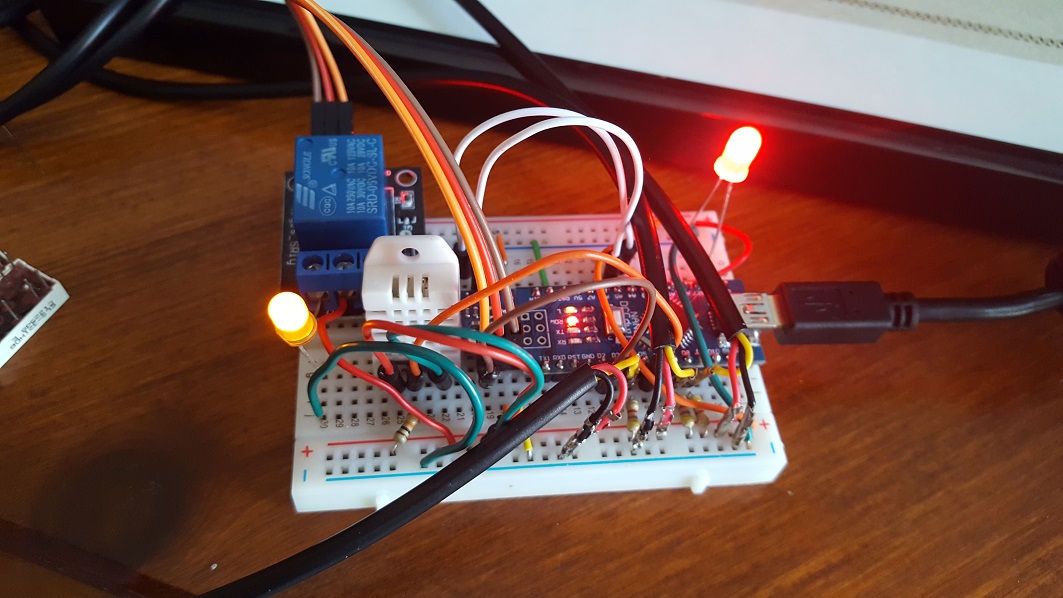
Step 8: Prototype the electronics.
The white sensor (DHT22) reads temperature and humidity. Three temperature probes will monitor the average mirror temperature. If that temperature gets within 3 degrees F of the dew point, the relay will close and energize a nichrome heating pad.
The white sensor (DHT22) reads temperature and humidity. Three temperature probes will monitor the average mirror temperature. If that temperature gets within 3 degrees F of the dew point, the relay will close and energize a nichrome heating pad.

|
|

